II
The first generation of my blog wound being 385 pages in Word and was terribly sluggish in updating online. So I present you the second generation of my original blog.
March 14, 2021
An update!
Nanye-he was leaking oil pretty
badly through the holiday season and it seemed that the weather wouldn't
cooperate at all. This weekend proved to be the weekend to get her fixed
up.
I sprayed degreaser all over the
undercarriage, oil pan, belt, pulleys, and body to get the oil spray off at the
carwash. She cleaned up pretty well so I got her home and up on the jack
stands. I wiped down the steering parts, the track bar, and the axle just
to make sure it was as clean as I could make it.
Pulling the oil pan was made a lot
easier by drooping the front axle and turning the steering all the way to the
right to get the drag link out of the way. With that down I could take
out all the bolts. No surprise, the pan just came off. The gasket
didn't stick to it as it was a Felpro PermaDry one-piece gasket. Now
understand I bought two of these when I bought all the gaskets. One was
in the Enginetech gasket set and another seperately since I wasn't sure if I
needed to get back into the crankcase anytime soon. I have mixed feelings
about this brand as it was what failed but then, I don't know of a single oil
pan gasket that hasn't. I've done cork, cork rubber, silicone by various
companies like Mr. Gasket, Felpro, Mahle, Enginetech to name a few. None
have not leaked within a two year span. I put RTV into the corners at the
front and rear where the gasket runs around the timing cover and the rear main
bearing cap but the leakes usually start somewhere in between. Many have
claimed a warped pan and needs to be replaced while others go so far as to say
the block needs to be machined. I've used cork and rubber since I began
working on engines and to be honest, RTV with these types have seemed to be
less prone to leaks. They are more difficult to scrape off but in the end
they seal better with a full covering of RTV on both sides than the one-piece
types in my experience. However, since I can't locate any cork and rubber
types I'm stuck with the inferior one-piece. And this is where I have a
problem. Fitment. A cork type can be trimmed according to the
requirements.
The one-piece isn't usualy made as
an o-ring type thus there are compound angles it must fit prefectly into to get
a good seal. Sharp corners are one of those never ending battles until
you realize the tiny gaps must be filled.
For example: The Jeep 4.0L oil
pan doesn't have sharp corners stamped into the area around either the rear main
bearing cap or the timing cover where they meet the flat surface of the
block. The gasket has the sharp corner molded to fit the sharp corner but
doesn't fit it properly as well as the more rounded corner of the pan's
stamping. It's like a round peg fitting to a round hole. There's
gaps in the corners that must be filled.
Now Felpro does make some good
gaskets but oil pan gaskets aren't one of them in my opinion. I really
like their intake and exhast gaskets as well as their composite cylinder head
and valve cover gaskets. I prefer Mahle or Victor-Reinz but those aren't easily
obtained locally except through online sources due primarily to Federal Mogul's
heavy handed presence in the auto parts stores.
Enough of that, no back to the
problem at hand...
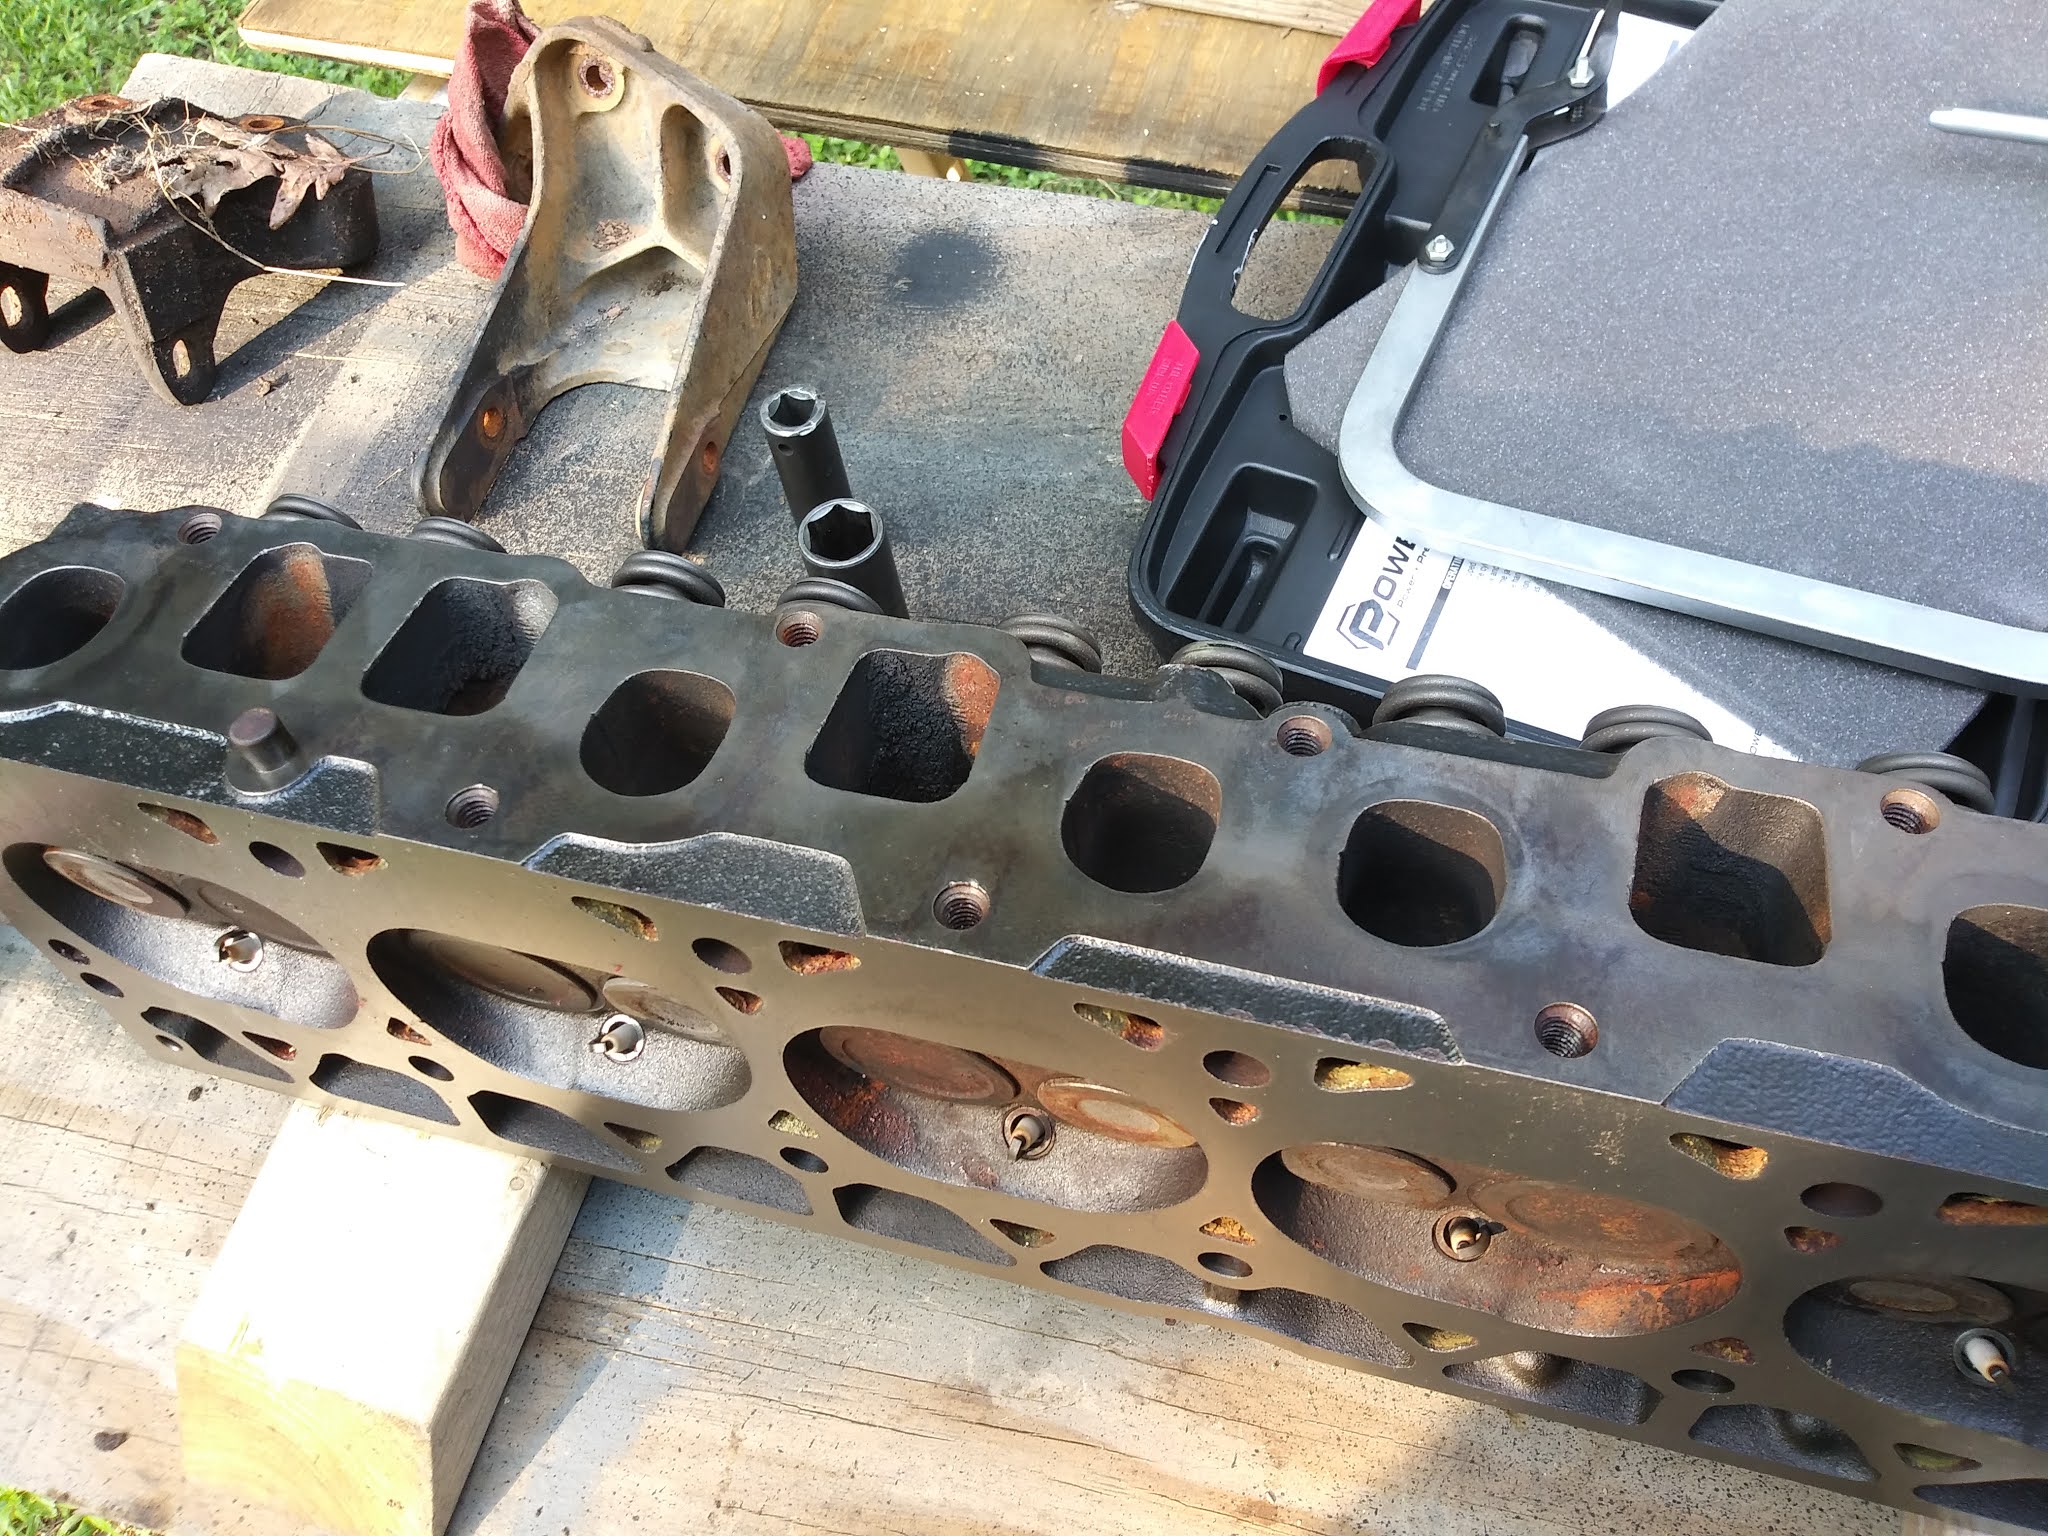
After dropping the pan I dabbed the
oil drips with a rag and inspected the gasket. These are some pics I took
before and after removal.
I also pulled Cylinder 1's
connecting rod cap to inspect the bearing.
 |
Still showing Babbit material after
32K miles. |
 |
Plugs in order from top to bottom:
Cylinder 6 to 1
#1 was the most normal looking while the others displayed blanching of the
insulators at the tip. This may also be due to the oxygen sensor being 259K miles
old and not giving good data to the ECM making the engine run even more
lean than factory specs. |
I was getting some serious pre-ignition when accelerating normally and as the days warmed up it was getting worse. Lead-footing the Go pedal during acceleration would make it go away but the fact I'm running 89 octane seems to be something other than the Mobil fuel I'm buying.
After pulling the plugs I could see why. It has been 32K miles since I installed these. The insulators are pretty rough looking with blanching of the tip on a few. This is typical of overheating conditions but also time to change them. I used RC12YLC plugs as specified by Jeep. These were the standard plug up to '99. When the ignition coil rail was introduced in very late '99 to early '00 models equipped with the 03312 head, the new plug spec was changed to RC12EEC which is a double copper design for longer life.
Copper is the best conductor of the three used in spark plugs. Then came Platinum and finally Iridium with variations of each type. Ignition systems have, for the most part, increased in energy for a hotter spark. Since copper plugs were typically replaced every 15K-30K miles with low or standard energy ignition systems, the high energy types needed a plug that could stand up to the higher temperatures of the spark. Platinum was readily available and is a harder material but added to the expense. These were supposedly good to 55K miles. As engines developed, so did ignition systems and the increased difficulty in getting to the plugs. Higher combustion chamber temps too became problematic and once again a longer plug life was desired. A 100K mile plug plated with Iridium is the current technology used.
I've used platinum plugs and iridium plugs in my Jeeps and have found that unless I use an MSD multi-discharge ignition controller, the engine doesn't perform adequately. The table below shows the thermal and electrical properties of elements used in spark plug construction. This table was taken from NGK's website.

Note the resistance value is in nanohms/meter. You might not think this is much but consider this is in addition to the resistance of the plug wire and the joints connecting to the plug. Distributor equipped systems have two gaps to jump. The first is from the rotor button to the post in the cap and the second at the plug's gap. Increasing the coil energy is the solution here but care must be taken that the coil's electrical properties are a match to what the ECM/PCM require for reliable operations. A coil with too low a resistance can draw too much current through the triggering driver transistor and burn it out. Too high a resistance can cause poor spark performance allowing misfires.
Eliminating the first gap was accomplished by distributorless coil pack and coil-on-plug type systems. Jeep went the coil "rail" route which I believe was nothing but a stop gap measure. Many knew Chrysler would not continue 4.0L production beyond 2006 due to the significant design changes for the upcoming 2007 emission requirements. Many Jeep owners have done away with the coil rail setup due to the difficulties in diagnosing specific spark plug issues which require removal of the entire rail to get to a single plug.
One solution was to use one of the coil packs from the Dodge Viper or a 3.3L/3.8L V6 equipped Dodge minivan. The 6-plug coil pack is plug-n-play with the coil rail connector on 2000 and later Jeeps. '99 equipped coil rail Jeeps had a different pinout and thus needs to be changed at the Jeeps connector, which needs to be extended if mounting it to the inner fender. Kits are available online. For those with distributors this will not work as the PCM does not have separate coil firing signals. A complete aftermarket solution is needed to improve or eliminate the distributor on these models but the oil pump drive must remain, hence the camshaft position sensor on '99 and later models.
- - - - - - - - -
After the reinstallation of the rod bearing cap, oil pan with new gasket, and refilled with fresh oil I decided to take this opportunity to replace the oxygen sensor. The original had been in there for 256K miles. With the 1995 ECM the engine does run better than with the original 1993 ECM even though the cruise control doesn't function with the '95. I also wanted to see if the O2 sensor might also have something to do with the lean fuel mixture. That was one item I hadn't checked with my scan tool so after this first tank full I'll plug it in to see what the numbers look like now. I kept the old sensor as a trail repair spare in the toolbox in back.
Reinstalling the battery I was ready to take her out for a test drive. She ran smoother and quieter with improved throttle response. After filling up I came back home to put carboard under the engine to check for leak points. The next day proved the pan is still sealed and not leaking. I'll keep an eye on this over the next week. The oil level has been noted and any changes will be recorded.
That brings this first post of my second generation Jeep blog to a close. Sometime in the near future I'll need to grease the chassis but a more thorough undercarriage washing is needed first.
By for now!
__________________
April 1, 2021
Greetings! Today Nanyeh-he and I celebrated our third year and 60K miles (96.5km) together! Though I had to work I had already given her her gift on Sunday. She got a shiny pair of Timken wheel bearing/hubs. Timken's part number is 513084 and feature tapered bearings just as Jeep had used from them at the factory. Moog and all others use twin ball bearing types and don't hold up as well. I believe in Phase II of the XJ in 1997 the wheel bearing/hub was changed, The composite steel sheet hub and cast steel braking material type brake rotors were replaced by an all-cast steel rotor and thusly, the face of the hub moved 1/4 of an inch in toward the center of the vehicle. The new all-cast rotors are thicker at the hub mating surface and rather than have some kind of custom rotor made Jeep decided on a rotor profile that already existed. What aftermarket manufacturers decided to do was to make an all-cast rotor for the older XJ's hub by using a shallower top hat to keep the braking surfaces centered and prevent having to use a different caliper and steering knuckle configuration. It might be possible to use the older Timken design on the newer XJ's if you use the older XJ rotors with an all-cast design. I have not confirmed this but makes sense. I am optimistic these Timken's will be the last bearing/hubs I change out for the rest of the life of the vehicle.
Truth be told she's showing her age a bit. Her engine has a few more rattles in the valve train indicating advanced wear in the valve guides. I'm hoping to procure a good cylinder head before she loses a valve and destroys the engine. I've been looking at used engines that were tested as running but that's only part of the story. They could have cracked blocks or heads and still run so I'm quite skittish about spending a lot of money on a gamble. A reman engine is preferred but I may be forced to buy a good head and block separately to solve the problem. Why another engine? I'm wanting to build the PMS (Poor Man's Stroker) engine using the AMC 258 crankshaft and rods with the 4.0's pistons to increase the displacement some. The generally available parts to do this will increase the engine with an .030 bore increase from 242ci to 274.6ci or from 4.0L to 4.5L. With the proper fuel injector selection and fuel pump pressure with an appropriate camshaft the theoretical Torque/HP rating is 316lb/ft @3250rpm and 256hp @4850rpm respectively. Actual values will vary to be sure. But it is an appreciable increase from the stock 185hp @4780rpm and 220lb/ft of torque @4000rpm. A drop of 750rpm for an increase of 36lb/ft of torque isn't too bad either since the camshaft profile would be changed from the older single-profile to the newer dual-profile with longer exhaust duration. AMC engines always performed better with this combination and I'm quite surprised AMC didn't do it at all or Chrysler having done it sooner with the '91 model year after dropping the RENIX (Renault/Bendix) engine management system AMC employed.
Still, using the second generation of Chrysler ECM will be impossible to tune as it is not equipped with a flash ROM. If I want any further gains in performance I'll need to go with an aftermarket engine management system since I won't retrofit a factory OBD-II system from '96 or later. I would be happy with just this increase as the displacement alone would offer.
She's been the dream Jeep I've wanted to build for a long time. Happy anniversary Nanyeh-He! Here's to our third year together! May we have many, many more to come!
_________________________________
April 10, 2021
The next chapter of my Jeep story has begun.
Chapter 4 - The Stroker Engine
Jeep Stroker: Typically performed on the venerable 4.0L (242ci) to increase displacement to some unspecified greater value until the math has been calculated. Target displacement: 4.5L (274ci)
I bought an engine today from a guy parting out a '99 Jeep Cherokee XJ. The block is said to be more durable and stronger than the previous version like mine ('91-'96). It also came with the last of the higher flow cylinder head (casting 0631) before the EPA ruined the design. It also included the intake manifold, valve cover, and he even threw in a power steering pump. Total: $210.
Though the cylinder walls exposed were rusty, they weren't really pitted and some WD-40 with PB Blaster allowed us to turn the crank to get the torque converter off the flex plate.
The only things I'll use will be the engine block and cylinder head. The pump is a spare and I dropped the intake and broke it and now serves as a lawn ornament.
With the exception of the expansion plugs, oil gallery plugs, block drain plug(s), the rear camshaft cover, and the camshaft bearings, the block has been disassembled. I found a couple of rod bearings at cylinder 3 and 4 that were worn down to the copper layer. There is evidence the bearing spun as the tabs that key to the rod and rod cap were flattened and scoring found on the rod's bearing saddle.
The crankshaft is in good shape and as it was fairly dark when I took the photo's I wasn't able to really get a good look at them. So far it looks like I might get a good price for it.
The camshaft showed its age and I'm not sure but the tappets may have been replaced as they are perfectly flat but the cam lobes are worn. The rear expansion plug on the back of the block looked brand new and the letters XJ written on the block. Me thinks this was from another '98 or '99 XJ. Jeep never wrote on the block like that. We found similar markings on other parts including the transmission confirming it as a salvage yard pick.
Getting the pistons out was a pain as I was fighting the rust on the cylinder walls. Oddly there wasn't any ridge at the top of the cylinder which makes me wonder if this block had been reworked. No doubt the piston showed signs of wear on the skirts but doesn't jive with excellent condition of the main bearings. Again, too dark to get a good look at the cylinders so I'll have a look tomorrow after I get it up on the stand.
Once I finish prepping the block for shop work I'll take it in to have it cleaned, checked for cracks, and the deck for warping. I am hopeful I will have it built up and ready to install by Christmas but that might be a bit optimistic.
For now the cylinder head will get the attention. I'll take it apart and get it to the shop as soon as I can.
The head will be installed on the current engine since it is burning oil at idle indicating valve stem seals are failing/failed.
_____________________________
April 27, 2021
Greetings All!
Been busy with work and put my radio stuff on hold for now due to the 4.0L needing some attention. As previously posted I bought a '98 4.0L casting 449 a few weeks ago. The head is at the shop and I delivered the valve stem seals and new valve springs today. Let's hope the head isn't a crackhead. ;-D
Now then, I spent some time measuring the cylinder bores in the block and here're the numbers. Measurements are in inches.
Cylinder
1 - 3.8760 / .0005 out of round / 0 taper
2 - 3.8780 / .0054 out of round / .0034 taper (wider at the top of the cylinder)
3 - 3.8755 / .0015 out of round / -.0135 taper (wider at the bottom of the cylinder)
4 - 3.8755 / .0015 out of round / -.0015 taper
5 - 3.8755 / .0015 out of round / .0020 taper
6 - 3.8770 / .0030 out of round / .0020 taper
From the factory the bore x stroke are: 3.88 x 3.41
After doing the measuring, I am happy this block has not been bored out. If I need to I could go the full .060" overbore. The cost would be substantially higher for pistons of that size not to mention the rings. The benefit would be going from a 241 cubic inch displacement to a 282 cubic inches displacement. This is what the Mexican built-for-Mexico Jeep 258 (4.2L) engines were but starting with a slightly thicker casting than those that were foundered in the USA.
Linked below are some of the source material I am using for my build.
That's it for this update. G'Night!
____________________________
April 30, 2021
Good news today! I have a set of Bosch 0280155715 4-hole fuel injectors for the stroker build! They are rated 24lb/hr. @43.5psi (3 bar). This calculates out at 39psi to flow about 22.85. This is an increase of 1.85lb/hr. This might solve the pinging at higher RPM under load I experienced while towing the trailer empty to buy the '98 engine. I say 'may' because even with the narrow correction window of the old Chrysler SBEC-II with the large single 65 pin plug, I'm thinking it cannot compensate enough to keep it running in the factory lean configuration. Without any other source to say otherwise that I can find this is what I hope at least. If not then I'll have to wait to finish the stroker to take advantage of the extra fuel supply.
In case these 24lb injectors do not work out with the stock engine, I did purchase a set of Bosch 0280155712 injectors rated less to replace the aged and worn out stock 1-hole injectors.
 |
Top Row: 19lb/hr. Bosch #712 injectors. EV-6 Jetronic
Bottom Row: 23.7lb/hr. Bosch #715 injectors. EV-6 Jetronic |
A note about the terms of the two injector types used on the Jeep 4.0L. From its first release in September 1986 for the '87 model year through 1996 the type of injector used was an EV1 with a Jetronic connector. In '97 I think the EV6 injector began to show up late in the year and came with a Jetronic connector. Chrysler was still fine tuning their harness and PCM system that replaced the old ECM. I believe the '98 model year switched over to an EV6 that used the USCAR connector if it wasn't '99. '99 and beyond saw the EV-6 USCAR type.
Most sellers of injectors for the 4.0L and others will be completely wrong in stating the injector is an EV1 with the narrow body because it features the Jetronic connector. This is by far the most mis-advertised aspect of these injectors and couldn't be farther from the truth. Somehow they have misunderstood that the EV type is only related to the connector style and NOT the body style. The picture below will easily show you the correct labeling of the two types of injectors.

As you can see on the left is a wide or "fat" body, 2-piece style injector called an EV-1. It is a first generation type Electronic Valve used in EFI systems. The EV-6 to its right is a sixth version type model. It has major improvements from earlier versions such as single-piece molded body eliminating leaks the 2-piece had been prone too over time. Due to a more efficient solenoid it features a narrow body style to fit in more compact spaces and all plastic outer body to reduce heat transfer and vapor lock. This is very similar to an even newer EV14.
The right side pair shows a narrow body EV6 with a Jetronic connector and the same narrow body style with a USCAR connector. You can see the differences between the shapes of the connector as well as the type of pin or blade used. To my knowledge there was no EV1 with a USCAR connector. There are some enthusiasts that prefer the EV1 over later versions but must use an adapter to retro fit the injector into a wiring harness made for USCAR or other type.
It is aggravating when speaking with or emailing sellers to learn more about a particular offering they have when they don't use the correct terminology out of sheer ignorance. I will use the correct term out of habit because I learned the right way to describe them. When they send me the wrong injector, I then am inconvenienced in having to send it back stating they are not what I ordered. Worse when they vehemently deny they made a mistake even though I provided proof. The picture above is what I send them to explain the differences. For those with closed minds, I simply tell them goodbye and blacklist them as they are too ignorant to have an intelligent conversation with. The terms are simply not interchangeable in any coherent technical discussion.
So with the arrival of a replacement #712, I'll have the stock set ready to install next weekend. The week after that is when I should have my cylinder head back.
The Jeep must go on!
_________________________________
May 24, 2021
Dang! Time is flyin' by! Sheesh! What have I done since April 30th? Saving my nickels.
I did get the cylinder head checked out at Cylinder Head Specialties in Wake Forest, NC. After I returned a week later with the new valve springs and valve stem seals he got to work on it. Three days later I got a call.
"This is Mike at CHS about your Jeep 4.0 head. It has three cracks in it under the valve cover."
Naturally I was pretty bummed out. Looks like half of my investment cost of the used engine just went down the toilet. As much as I wanted the 0630 head to work out, I am now forced to look for another solution.
Which brings me to my current situation. Asking my boss where Carquest used to get their cylinder heads he brought up the name Dover without hesitation. I called their office in Charlotte and they were out of 7120 and 0630 castings but I should call their Greenville, SC location. I did and found they had a lot of 7120 castings. I ordered up one and as of this week it should be in final assembly and ready to ship. I do not know if I get new valves and springs yet. I won't know until I see it or a build sheet. Estimated cost is $450 with a refundable $100 core charge once they get my 0630 casting back.
In the meantime.....
I installed the Bosch "712" fuel injectors described in April's post. Everything seemed to work okay but during the test drive I noticed she didn't have much in the way of get-up-and-go. She seemed like she was holding back so I pulled out the OTC Scantool, the 4000 Enhance model OBD-I scanner, and took so readings. I was surprised to see the computer was flip flopping between OPEN and CLOSED loop modes.
Under load she's sluggish and doesn't really come out of it with increased RPM. The coolant temps are higher so I'm figuring she's running more lean than usual since she's always in a kind of "limp mode".
When the PCM (Powertrain Control Module) goes into Closed loop mode, the fuel/air ratio at the injector is determined by the oxygen sensor rather than a set of fuel curve tables stored in the ROM of the PCM. When there's too much oxygen is sensed in the exhaust stream, it us running lean. If there's not enough oxygen in the stream then it's running rich. The PCM compensates by adjusting the width of the pulse sent to the injector. The wider the pulse, the longer the injector sprays fuel into the intake runner. For example: At idle the injectors typically run about 3 to 4ms in the "ON" state. Mine are running at about 4.5ms and higher in order to keep the 14.7:1 air/fuel ratio in the exhaust stream. This is while the engine is in Open loop mode at idle. My fuel rail pressure is running at 40psi which is normal for this engine. Raising it does not affect how well it runs.
Now when I pulled the trailer to go buy the other engine, she was knocking like crazy tying to climb hills and get up to speed on the highway. She was also getting hot. I figured at that time it was because the injectors were dirty and didn't give a good account of themselves thus the reason to replace them.
Now I am wondering if one of two things is happening. First, the injectors aren't sized correctly for the amount of fuel rail pressure thus the injectors can't deliver enough fuel on demand. Second, the oxygen sensor (O2) is bad.
I watched the O2 sensor voltages during idle and while driving (as best I could before I figured out how to get the scanner to record). I found the voltages ran between .1 and.9 fairly consistently but not evenly. What this the product of poor fuel injection or a bad O2 sensor? I replaced the old sensor simply because I believed the engine wasn't running as well as it could. Granted she's got over 258K on her but I felt she should be performing better. At times she would and I attributed those times to cool days with just the right amount of humidity. Now I wish I had pulled out the scanner before I swapped fuel injectors to get a baseline. Maybe the O2 sensor, even though new, is the problem. I also have to take into account this PCM came from a salvage yard '95 Jeep XJ. Even thought she runs smooth, the cruise control will not lock in and hold speed unless I hold the SET button in. The orignal PCM for my Jeep made the engine idle kind of rough so I kept the '95 PCM in it. But it's quirky. It could be the fault of the '95 PCM all along which may explain the cruise control works fine with the original.
So I had already removed the filter capacitors from my original 1993 PCM when I pulled the old capacitors out and am waiting for parts. I'll put that back in once reassembled to see if things change. I hope they do!
 |
The original 1993 PCM. This is a Chrysler
SBEC-2 OBD-I type and precedes the OBD-II
PCM's requiring emissions testing at the
data plug rather than the tailpipe. |
 |
| The three filter capacitors. |
 |
The silicone gel scraped away to get to the solder
points on the capacitors for removal. |
 |
| Capacitors removed. |
 |
Original Siemens EV1 fuel injectors with
Jetronic connectors. Over 258K miles of use
on these. Their spray pattern is via a single
hole that is more like a stream. The newer EV6
injector with Jetronic connector has four holes
which promotes a finer spray to promote
better atomization and fuel utilization.
|
That's all I have for tonight.
__________________________
May 28, 2021
Good evening. Some progress was made with the '93 PCM. During testing of the '95 PCM I and using in the Jeep I discovered anomalies in the readings after finally getting the scan tool out. I saw O2 sensor voltages fluctuating between .2 and .8 volts which isn't really normal. However the Lean/Rich indicator was flip flopping back and forth as it should. At first I suspected a bad O2 sensor out of the box. Other data seemed consistent but the power curve just isn't stable to keep the system in Closed loop mode. So I decided to wait for the new capacitors that filter the voltages supplied to the '93 PCM.
They did come in and after getting home after work I installed them onto the circuit board sans silicone weatherproofing. I did install the PCM in the Jeep and fired it up. She ran much more smoothly than before. After connecting the scan tool up I discovered no O2 sensor voltages or the Rich/Lean indicators lit up. I also couldn't tell if it was in Open or Closed loop mode. The next step was to install the 1993 cartridge in the scan tool and try again. The result was the same. What was odd was the fact that the 1995 cartridge covers all Jeep models but the Cherokee wasn't in the list. But when I used the '93 cartridge I was able to pick the correct vehicle. Very odd.
So for now I'll keep the '93 PCM in the Jeep and run it. I know there are differences between the '92-93 and '94-95 PCMs. I am still trying to find out what they are since all the pins are the same. SCI data protocol or perhaps Chrysler started using their CCD bus for the other data I cannot see over the SCI bus.
That's it for tonight.
________________________
July 2, 2021
Greetings! June has come and gone but the XJ remains. The engine is running well with the original ECM since repairing it. I guess it took a bit to finish its learning mode after so many key-start events. Still no O2 data or closed loop confirmation but after reading the FSM on how it actually works I won't expect too much from it from now on. It's only in closed loop mode during idle and while cruising. It's in open loop mode during acceleration, deceleration, and wide open throttle (WOT) situations or when towing when the load exceeds the EMC's ability to maintain a 14.7:1 oxygen ratio then it will default to open loop with the "additional fuel trim" mode based on it's perceived load.
I bought a cylinder head from a Jeep mechanic I know over at the dealer nearby my work. We got into a discussion of Jeeps, as usual, and my quest for a good cylinder head came up. After hearing my sob story he said he had a good head from a '97 he pulled it from and said I could have it. I had to offer him something for it so he said a case of his favorite beer would do fine. "Done!" I said and headed back to my work to go to lunch and get his beer. After I got the head from him the next day I realized I'd just paid $14 for it. That saved me $300+ for a reman piece I'd not been able to find. So I would spend some of that to get this one cleaned and machined since there was rust on the chamber face.
The shop took it in and had it done in three days. They only had to mill off .007" (.1778mm) to get the rust off. Knowing that helps. My compression ratio has gone up but how much is still unknown until I CC the chambers. But that's later in this post.
I pulled the shopped cylinder head out of the back of the Jeep today and put it on the workbench outside my little barn to get a good look at it. The cleaning process did a good job getting most of the carbon deposits out of the combustion chambers. The intake runners were really caked on. The exhaust runners weren't as bad. This is what happens when the PCV routes oil vapors from the crankcase directly to the intake manifold from the valve cover. An oil catch can should be installed between so that only the gases are sucked in and burned. It wasn't really a problem in carbureted engines since the fuel and air mixed at the carb thus keeping the oil in suspension and sent to the cylinder to be burned. Without any solvent mixing in the air inside the intake manifold, the residue builds up and reduces efficiency. Treatments like Seafoam help but work only when it is used. The intake valves remain cleaner because the fuel injectors are pointing the fuel charge at them.
All of this is preliminary work on cylinder six's combustion chamber and valve train. Pulling the valve spring and lock retainer removal tool out I got it set up and ready to go. Using a 15mm impact deep socket and a plastic head hammer (soft hammer) I popped the two valve springs to break the locks loose to "unstuck" them. They'd been on there for a long time and look to be the original valve springs. They have the factory inspection paint markings on them.
Next was to compress the spring and the valve locks fell out just as hoped. Releasing the compressor I pulled the spring off and inspected it. Other than the dull spring steel and the paint mark it looked in good shape. The valve locks did too as did the retainer. Even the valve guide seals looked good! I'm beginning to wonder when this head was worked on last. Lee said it hadn't that he knew of. I'll measure the free height of the springs later as well as the installed height.
Next was to remove the intake valve and upon pushing it open at the stem tip I was surprised to find it moved very smooth for the initial opening. It got more snug as the stem passed through the seal and just pulled out like it was freshly oiled. Oil was still trapped in the guide believe it or not! That meant the seal did it's job and prevent anything, including the cleaning solvents when it was at the shop from washing it out. Score! Seals are good but will still be replaced as a preventative measure.
Carbon build up was present but not heavily caked on so it was easy to clean off with the wire wheel on the Dremel. The exhaust valve exhibited a bit more resistance required to remove it and found there was no oil on the stem. Coking is a common problem where high heat and petroleum are combined where there's little to no flow of the oil. So I'm not really surprised to see this. The valve wasn't as caked with carbon as I thought it would be and even the runner had less in it than expected. A few minutes with the wire wheel cleaned up the valve and the runner real good.
Now on to the combustion chamber...
Typical of anything metal that has been milled or machined it will have sharp edges. Sharp edges in a combustion chamber is a bad thing. Why, you might ask? Sharp edges can have points that can become hot enough to ignite the fuel/air mix before it's supposed to thus causing the familiar "ping" or knock. I liken it to the sound of rocks in a tumbler can. Done enough it can destroy connecting rod bearings, crankshaft bearings, crack and/or melt pistons leading to a whole chain of "bad things that can happen" and that'll just ruin your whole day.
So to alleviate the chance of detonation or pre-ignition I used a sanding drum attachment on the Dremel to relieve the sharp edges and turn them into dull edges. A hammer is more satisfying for stress relief but I needed non at the time. 👌😊
After doing that I proceeded to relieve the chamber of the carbon buildup while also sanding the peaks of the casting texture down somewhat. Not too much as I still need to CC the chamber. After a while the chamber was looking good and much cleaner with fewer casting marks to promote detonation. It's funny how things start to come back to you after decades of not having done it. It's like picking up where you left off.
About this time I got a notification that the 100mL burette I ordered came in. It was too late in the afternoon to go up to work and get it. No problem. I still have enough light left after work during the week I could set the head up to CC the chamber later.
Since I have still have the cracked head I will go practice a mild port casting relief down the intake and exhaust runners before I attempt it on the good head. For years hot rodders have preached port and polishing yield some of the biggest horsepower gains. Mmmmmmyeah...no. Only if you're running high RPMs. Making the ports larger with porting increases the intake runner volume and in doing so you lose air velocity. This makes the air move slower through the runners at any given RPM because you have more space for the air to move. For forced induction that's a good thing where you're pushing it into the cylinder. For us naturally aspirated folk, it doesn't do anything but make for poorer fuel mileage, poor off-idle throttle response and generally just runs worse until you get the RPMs up over 3 or 4K. The piston has to pull the air charge into the cylinder in order to fill it. It needs the higher velocity of air flow to help fill the cylinder via flow momentum. With high speed air the cylinder can fill more quickly and more fully at lower RPM.
Gasket matching is the practice of grinding out your port entry to match the hole in the gasket. Well, if air flows faster when it is forced through a narrowing passage, like in a carburetor, then opening the passage will slow the air down. If the air can flow entirely through the intake runner of the same size all the way to the valve the velocity wouldn't change until it hit an obstacle like a curve or imperfections found in mass production heads and manifolds. Having a section area widen to match a port gasket interface then squeeze back down to an as-cast will undoubtedly slow the air flow then perhaps speed up but not as fast as it was before it hit the widened cross section. "But that's why you port match so the size remains the same!" I hear some of you cry out. Remember the larger air space slows down air flow until a sufficient RPM is reached to take advantage of it. Enlarging a port and runner raises the RPM range it's most efficient at. So I don't gasket match the port. That little gap between the intake and the head won't hurt performance of a low RPM torque mill. If the intake port on the manifold isn't line up with the intake runner in the head then there's an issue that needs to be addressed but only just.
Blending the bowl at the intake and exhaust valves makes more sense. The milling work done for the valve seat leaves a lot to be desired and a lot of rough, uneven surfaces. By blending the bowl and taking some of the casting marks off from the roof of the runner, where the air flow is highest, and blend it to the shape of the valve seat you're making a smoother high speed path for the air to flow past the valve seat and to the valve. Polishing doesn't help here either in low RPM engines built to make more torque than horsepower like the straight six with a typically longer stroke than most V6 or V8 engines. Some turbulence is still needed here to keep the fuel suspended in the air flow. Polishing will give the air a much faster velocity at the walls that the fuel condenses on the wall. Direct injection engines benefit better from polishing where there is no fuel mixed at the intake valve or at a carburetor.
Enough of that. That fact I found a good cylinder head in such good shape is a boon to my project build. The block I have for the stroker project will be used as a test mule for the new hone I bought from Lisle. That last engine I did was 1997. the wife said we were pregnant in February of '98 and I sold the cars and the tools. I was in IT at the time, before it was called that, and thought my building days were over. Like I said earlier, it's amazing how much comes back to you after decades of not having done it. Would never have thought I'd own a hone again let alone a burette and a piece of plexiglass. Now where did I put my dial gauge?
_______________________________
August 2, 2021
It's a month later and I did finish the project on the weekend of July 17. It would be a weekend later before I could a repair an unexpected fuel pressure regulator failure during pressure testing. The failure was the main o-ring that sealed the body to the fuel rail. This event sprayed a fan of fuel that ran right onto the cylinder 1's exhaust manifold pipe. Suffering an epiphany, I quickly decided to adopt the 1996 return-less fuel system and started research after the end of the day. I finished up connecting everything that wouldn't need to be removed again to swap fuel rails, which wasn't much.
But before I go on, here's a few pics of the cylinder head activities and the reason why I was down for two weeks instead of one.
 |
Dateline: July 12, 2021 - Rain sucks when it's too early to quit.
Covered the head in WD-40 and a couple of trash bags.
The tarp overhead had leaks and it was starting to come down
hard so I had to get everything buttoned up. |
 |
Intake valve on the left came from cylinder 3.
Intake valve on right was cylinder 1 after cleanup. |
 |
After deburring the combustion chambers to reduce as many
points of pre-ignition I noticed how prominent a couple of
the intake valve seats were. This is an 0630 cylinder head and
it's the third cylinder head design for the 4.0L and the second
under Chrysler ownership. My original 7120 head doesn't
have this bad a workmanship. So I decided this would be
the temporary head and my original would get the special
treatment and put on the stroker in the future. |
 |
Kinda makes me sick to see this. I did go over these edges
with a pencil tip grinding stone to smooth it out as well
as knock off the sharp edges of the chamber. |
I ran the Dremel with a drum sander past the seats and knocked down the high points in the bowls. A pencil tipped stone was used to get into the narrow radius on either side of the valve guide casting area. The port side of the head was done up with a steel wire wheel on the Dremel to clean out the carbon and rust build up the shop didn't get during their cleaning process.
At this point I cc'd the chambers and all came out within 1/2 of a cc of each other. I was happy with that result and the fact the valve lapping worked well. Nothing leaked past them and I used rubbing alcohol for the cc'ing process. After installing the valves and springs I checked the installed height and they did vary but not outside their specs.
 |
With the head assembled and installed, the
rockers and pushrods were installed next. |
 |
Since the 1997 head casting does not have
the boss for the 1993 temp sensor, I needed
to drill and tap the extra flat on the thermostat
housing for a 1/8 NPT. Up to '96 the temp
sensor was still separate from what the ECM
used. The larger unit in the photo is for the ECM. |

I don't have any pics from the fuel leak fiasco.
I began working on the brake system and pulled that project box of parts out to install the dual diaphragm vacuum brake booster I pulled from a 1995 XJ. I used my A/C system vacuum pump to test the booster and it passed quite well with the vacuum holding for ten minutes. The master cylinder I got with it was toast so a new one had already been procured and was now installed. Three 8" NiCop brake lines were in the project box and bending them with an appropriate tubing bender went without incident. However, the connecting points to the vehicle's tubing required some adaptation. I already had three unions but hadn't looked at the distribution/proportioning valve block. After figuring out what was needed a trip to two local parts stores had the booty I needed. Snagging a meal on the way home helped. Installing them went pretty much good. It took a little manipulation of the tubing got the alignments right so the flares would mate good and not leak. After this it was time to quite as the day was turning to evening bringing out more mosquitos.


 |
After the lines were test fitted I removed the distribution block
and cleaned it up along with the booster. The master cylinder
was then replaced and everything put back together. Sadly I
cannot find those pics. I'm hoping they are still on the phone. |
Sunday was more of the same with the brake system upgrade.
All that is needed is the new pump and a trip to the local bone yard. That would happen on the 22nd.
 |
I nabbed the fuel rail with a damper from this
2000 PINK XJ. Obviously not the original color. |
 |
This 1998 XJ donated a fuel rail without the damper. She also
gave me a clip mount for the crank position sensor that mine
didn't have as well as a charcoal evap canister. |
 |
From the top: Evap canister
my original fuel rail
1998 fuel rail
2000 fuel rail |
So now I have two fuel rails as I planned for one to have a pinhole. I used the 1998 rail first and it didn't leak. I was leery of the 2000 as the damper has an o-ring that could fail. There it is located on the the engine is lined up with the exhaust port pipes for cylinders 3 and 4 but overhang the intake. Should it leak and spray as the regulator on mine did, the Jeep will go up in flames. Total cost of the parts, less than $50.
 |
The fuel rail cleaned up well with the wire wheel. The intake
also cleaned up well after after putting in the effort.
Simple Green was used with a brass brush and came out
a little better than I thought. The runners were full of sludgy
build up from the PCV system. Cylinders 3,4,5, and 6 were
a lot worse than 1 and 2. Patience and persistence with a
lot of perspiration did the trick.
|
 |
Here's the new fuel rail with a single pressure
connection. The old return line is tucked in
behind the power steering hose in the photo.
It goes to the rear but is not connected to
anything back there. It could be used as a
backup fuel line with some modification
back there if needed but would require some
kind of 3/8 to 5/16 reducer at the fuel pump. |
Speaking of fuel pumps...It arrived on Friday the 23rd. Just in time for the weekend Jeep work session on Sunday since I had to work Saturday.
 |
Comparing the original rebuilt pump on the left
to the brand new 1996 pump on the right. |
1996 was a transition year. It still had the old body style, metal fuel tank, direct sense gauge cluster but incorporated the newer engine management system (JTECH) for OBD-II compliance. It was the only year this combination would be used. 1997 would see softer body lines, updated interior and amenities, a polyethylene fuel tank and a new fuel pump style that inserted into the top. The fuel pressure regulator and filter were integrated into a single module that sat atop the pump and could be changed without removing the pump. The fuel tank, however was required to be dropped to do that. A hatch directly above the fuel pump could be cutout and hinged to make this easier to do but would have to be sealed to prevent migration of fumes into the cabin. No one that I've seen has done it.
 |
Different pick up strainers pointed slightly off
from each other. |
 |
Time to cut off the '96 harness plug and wire up
the '93 plug to it. |
 |
| Installed and hopefully won't leak around the flange. |
One thing to note about the '96 is that this is the first year the return-less system is used on a Jeep and it runs at 49psi instead of the 39psi the old system used. The fuel pressure regulator is also located on the support stem of the pump inside the tank. Any pressure to be bled off is simply diverted through a tube to the bottom of the tank. No external return connection is required. Oddly though, the regulator looks just like the one used on the fuel rail for '91-95 models but without the vacuum line barb.
The other thing is that this pump uses the same ohm range for the fuel level gauge as the original. 5 ohms full, 105 empty. My new pump is slightly off and reads a needle's width lower than the Full mark. Before, it read a needle's width above so I'm having to adjust my perception of the fuel level. It's already starting to annoy me than I have five gallons of fuel when the needle is below the E. I'll work on a solution for it at some later time. Maybe the float arm needs adjusting.
With the fuel pump installed and pressure is well maintained, I burped the rail before the first start up.
As I mentioned in the video the brake system needed to be bled. Starting with the left rear wheel cylinder I was finally able to fully flush it out from six-month old fluid with no leaks. Or so I thought. Back up front there was a wet fitting. Tightening flare nut while moving the tube in a circular motion to make it seat on the inverted flare in the block proved a good move. Back to bleeding and the left rear wheel cylinder. I use a simple bottle with a 3/16 clear fuel line inserted into a hole drilled into the cap and a tie wrap (zap strap, zip-tie, etc) on the tube inside to keep it from pulling out. There's some fluid in the bottom and I just crack the bleeder screw open. I don't open it up more than 1/4 turn from it breaking loose as I don't want air sucked in past the threads. Had I Teflon tape I would wrap them and not worry about it but I didn't know where it had gone to since using it on the temp gauge sensor. But I digress.
I refilled the reservoir and noticed the same fitting was wet again. Now I was getting concerned as this goes to the left front caliper. I tried tightening up again but it didn't budge. I wiped it down and pressed hard on the brake pedal and held it. It was dry so I figured I spilled a bit down the side of the reservoir. I now moved on to the front passenger caliper. It bled quickly but I made sure to run several pedal pumps through it. The fitting was still dry at this point so I bled the driver's side caliper and, the end.
Fast forward to today and I've driven it for a week without no problems except that darn brake fluid. I retightened the fitting above the one that kept showing signs of a leak. So far, it seems that was where the real leak was. So after a couple days I checked it again and again it was wet with fluid. The sun glinted off shiny stuff on the reservoir and found it was overfilled thus leaking down the sides. So okay, I've been fooled twice, shame on me. At this time the fittings don't leak. Hoorah!
At this point the A/C system needed to be finished and so that was done this last weekend. Typical expansion valve replacement, dump some oil out because there's too much and vacuum the system for an hour. So far so good. The vacuum held and was time to put in the refrigerant. Though this is a 1993, I replaced the whole system with a 1996 system. Fewer parts and all but the liquid line was available. The liquid line was obtained from the bone yard a year ago.
After putting in 24oz of R134a the system is doing a couple degrees better than before. It is able to reach 50F of discharge air at the center vent on a 97 degree day with 60% humidity on MAX cool with the blower at setting 3 of 4. I'm happy enough for that. It barely got to 58 before likely because the system had too much oil in it but a couple of A/C technicians mentioned the system seems a tad small in capacity since the original '96 system was supposed to hold 32oz for two pounds of R134a total. At this point I think it's because the evaporator isn't as large as the original and doesn't have the multi-path routing of tubes through the fins. Rather it has a construction similar to a heater core, tanks on either end of straight tubes. The expansion valve may not be working to cause the liquid become a gas very efficiently.
So with that update I'll call it a night. Thanks for stopping by to check out what I've been up to.
Bye for now!
___________________________
December 21, 2021
It's been a bit over four months since the cylinder head and booster/master cylinder portion of the brake system were replaced. Since then I've been messing with the fuel injectors and oxygen sensor. I finally settled on the Bosch 19lb/hr injectors (rated flow with Heptane, not gasoline). The 24lb/hr injectors ran real rich at idle and if not at highway speeds, really lowered my fuel mileage. With this era of electronic engine control there's no really getting more out of the Chrysler SBEC-II system. It doesn't have a flash ROM but could be retrofitted with one. That opens a whole new can-o-worms. The 1995 computer I have is faulty and I can send it in to see if it can be repaired for a fee. If it can be repaired, the fee will go toward the repair. If that works out I can probably get it flashed at a tuner, for more money. By the time it's all said and done I will have well more than the cost of a MegaSquirt III standalone engine management system. This puts a damper on building the stroker engine. I may be better off selling the core parts I have and buy an assembled stroker from someone like Golen. It's twice the price as stock but professionally built, dyno break-in service, and crate shipped to my door for under $7K. That's also easier on the ol' bones. All I would need is a concrete area and a cherry picker to lift the old engine out and drop the new one in.
That dream aside I did take her on a road trip to Florida in early October to see my folks and enjoy some downtime. I spent three days visiting and getting out onto the Beach in St. Augustine to work some amateur radio stations across The Pond. When it was time to go I said my goodbyes and pointed the ol' girl North and headed toward the Outer Banks of North Carolina and some more radio fun. When I got to the campground it was close to dark so I pitched the tent, threw in the bedroll and sleeping bag and crashed. I hadn't done a 13 hour day on the road since I hung up the keys to my big truck. It was a loooooong day for sure.
Friday morning I awoke to a pretty good day and immediately took to the beach south of the famous Hatteras Light. After some breakfast and coffee, I spent some time roaming around seeing a great deal of sand and ocean. I finally decided to try to get to the outer most point on the island. Well, Google Maps seemed to disappoint as the path they said was there was not. I figured the Google hadn't been updated in a while and took a stroll for a good ways. When I stopped and checked, Maps showed I was standing about 300 yards offshore. So much for Google Maps accuracy. Don't use it if you go out into the wilderness and by some miracle, still have cell service. You'll be even more lost with it than without it.
I got one good day out of it at least since a storm was coming in from the sea. By late Friday night the bottom fell out and chased me into the Jeep for dry shelter from the tent. By morning it was gray and wet. The tent was soggy so I left it and headed to the beach again and hoped it would dry some before I got back. I also needed cell service and the there was none in the campground. I had plenty of signal out on the beach though!
I parked at the edge of high-tide to make some breakfast and coffee. I thought about deploying the antenna again but rain was annoying. With the high tide peaking about 10:30AM, I stayed and just watched the waves listening to the sounds with my eyes closed. The surf had washed over the area I had parked once by 10AM. As the peak got closer the surf made it to the Jeep's position and after three successive washes under the Jeep I figured it was time to go home. The storm wasn't breaking up and the rain kept turning on and off, hence the hesitation about deploying the antenna.
Back to camp and break the tent down. I wrung it out as best I could before packing it for travel and reconfigured the Jeep for highway use. I re-aired the tires at a gas station near the entrance to the road to the campground and off I went up NC-12.
The trip home was uneventful and by the time I got to Rocky Mount I was ahead of the encroaching weather system and drier skies. Another hour later I was rolling into town. After arriving home the tent was pitched in the back yard to dry and the Jeep unpacked the following morning.
I mentioned injectors earlier. I ran the Bosch 24-lb/hr injectors the whole trip thinking the 19-lb /hr injectors would run too lean and burn through a piston. I hadn't thought about Bosch's rating with Heptane and wanted to find out more as to why they use Heptane. I never truly found out why but I did find something intersting. A little research effort yielded a surprise. Gasoline flow rates are higher. After finding a formula online to help with the differences between the two I discovered the 19-lb injectors actually flow a hair over 21-lb/hr. This was the same as the original factory installed 1-hole Siemens injectors. The 4-hole Bosch's would have worked just fine and likely gotten a little better fuel mileage in low RPM situations like off-roading on the beach.
I installed them since the trip and have eeked out a little less than 1MPG in my daily drive to work and back. She runs much more smoothly than with the other injectors. Throttle response is much improved and she doesn't bog down at WOT. A stroker engine would have the displacement to handle the higher fuel flow of the 24s.
Well, that's pretty much it. Work on the Jeep for the Winter is limited to regular maintenance. Time for radio work inside on the workbench.
Bye for now!
______________________
November....2022 ???
James Emery Nash, Jr. January 19, 1944 - May 8, 2022
aka: Call sign: W4KIS (SK)
____________________________
As the subheading reads, a bit has happened since December 2021's post above. So here's a quick rundown:
After the injectors were installed I had been getting OK fuel mileage and the throttle response after the ECM had gone through its "Learn" period was quite good. These are fine for street and highway mileage has gone up.
Christmas, New Year's, the Super Bowl all happened. I woke up May 8th, 2022 to a voicemail from my sister to call her. That phone call seemed to stop life. About 2:15AM May 8th, my dad had passed away from complications with undiagnosed meningitis. It wasn't known until the autopsy caught it. I put everything on hold, including the planned gear change for the front and rear. I knew the rear end wasn't in the best shape after having a look when I returned home after the October trip to see my dad and mom. Everything is pretty much a blur. Getting home after the funeral was the roughest trip home I've ever made.
I did get the gears for the rear end swapped out in mid-June and put over 400 break-in miles on the set before going to see my sister in July for her birthday. The Jeep did well and draining the fluid after arriving at her place saw nothing significant except...the spider and side gears had a lot of slop in them I hadn't noticed before. After planting an Aspen in memory of our dad and having a bittersweet birthday, I had to get back home in time for work Monday.
The vibrations felt while returning home were the same as the ones on the way home from the funeral. Only a bit more pronounced.
Fast forward to September and the front ring and pinion gears are swapped out with the same result. Slop in the spider gears. I don't know why I seem to manage to forget important things like these little gears but there it is. I wanted a selectable locker up front and a limited slip in the rear and tried until I couldn't cough up the cash for either. So I settled for new spiders in the rear as a band aid until I get the LSD. The cost of a new one is as much as a used one and purchase a rebuild kit for it. Might as well let the pro's handle the rough stuff. I don't much like working with sprung systems under high tension.
Anyway, the reason for the LSD choice is simple, I get the best compromise between traction and street ability without risking spinning out with an automatic locker like the little lunchboxes, or wish I had some better traction without going full lockup. An LSD fits my use perfectly. $400 at the time of this writing will get a new one. Am Eaton Detroit True Trac will give me the same street performance with the added lockup nature when it's needed for $800. Do I take out a second mortgage on the house or the wife?
For the front I want a manual locker where I pull a cable and it's locked. No solenoid or air activated setup. If the cable breaks, I go under and manually lock it into position and away I go. No air leaks or failed pumps. No electrical shorts or burned-out solenoids. There when I need it and not when I don't.
Yesterday I replaced the spider gears in the rear. No more clunk or chunk. Just the vibes out on the highway from that damn bearing in the rear driveshaft SYE housing. That's next on the list to do. After that, spider gears up front and the front driveshaft reinstalled.
The ham radio installed in the XJ is working well. I've been working domestic stations and listening/reporting the WSPR or FT8 traffic to PSK Reporter when I can. Heard a couple of FT8 stations in Ukraine since it appears the ban on ham radio use there has been lifted. It's nice to be able to just enjoy the radio hobby when I want while out and about. I think my dad would have stayed in the hobby had I gotten deeper interested in it earlier. I have all of his Heathkit radio and test equipment at home for some time and was in the process of repairing his SB-401 transmitter when he passed. I was going to have his dream system set up to have him operate at least once on a visit back to NC but sadly, that won't happen. Since then, I've put his radio gear up on the shelf to look at and be reminded that it was he was the one that got me interested in the first place.
__________________________
November 21, 2022
JARSfest was yesterday and I was really looking forward to going with a friend who recently got his General ticket. With that, his radio expenses quadrupled! LOL! But seriously, it was going to be fun. Right up until my Jeep died.
Coming to an intersection just before the on-ramp to the highway, she sputtered and lost power. The more I pressed the throttle the worse it got until BANG! Unburnt fuel in the exhaust ignited. After that, nothing. I got through the intersection in Neutral and coasted to the entrance to the shopping center. The downhill continued allowing me to get into the parking lot and stop in a parking space away from the buildings. I texted my friend and let him know what happened and he came out to help.
After a half hour trying to diagnose the problem, I decided to just go with him and still try to have fun at the hamfest.
We did enjoy going. He found some support hardware for a wire antenna installation at his place to complement his IC-7300 acquisition. I've recommended some DX Engineering Antenna Wire with some more hardware not found at the hamfest as well as an AH-4 feed point tuner to work with the 148ft wire.
So when we finished at the hamfest he brought me back to my Jeep and I went to work on some more ideas I had. None worked and he offered to help with a tow. After dropping the Jeep off he drove me home. All this with a six-day old knee surgery. He said he was fine and after dropping me off at my house, I texted his wife to let her know he's on his way. He behaved himself and didn't strain the knee. She appreciated it and thanked me.
So today I got to work and went to do some more on the Jeep before clocking in. No joy. Lunch came and I decided to put a known working crankshaft sensor in I had as a spare. No joy there either. So what's next?
I pulled a spark plug and found it was wet. Okay, wet fouling means there is fuel. The question is why? No spark? Wait. I had consistent spark from the coil wire to ground. So why won't it at least pop? I connected my scan tool and found it registered RPM, Vacuum, BARO pressure, and TPS voltage. I then went through the switch and ATM tests and found everything functions. Even the MAP sensor showed a value equal to the BARO pressure.
A check on the fuel rail pressure showed it rose to 49psi. Turn the key off and it bleeds off rapidly. No fuel leaks found so that mean one of two things: 1) The fuel pressure regulator check valve is bad. 2) An injector is always open.
So far I'm striking out. Hopefully I'll get her going tomorrow.
________________________
November 27, 2022
I still have not been able to determine the problem. I've narrowed it down to either an electrical fault in the MAP and/or TPS circuit as they are powered by the same source or, and mechanical issue leading to the same condition. I didn't load the Parts Cannon and blast away. Instead I did a regular tune up process of spark plugs, cap and rotor, which was needed anyway. Some carbon tracking and burnt electrodes in the cap with equally burnt rotor. I could suspect the ignition coil and replace it but the windings show the proper ohms reading even when hot.
I have not done the compression test yet as I'm trying to rule out input and output devices. On the off-chance the MAP was giving false readings I decided to swap it out with another from a 1995 XJ. It registered the same values w/engine running. I left it in. I have driven it without the O2 sensor plugged in forcing it to run on programmed default fuel tables. No real improvement after warming up.
I checked vacuum and sprayed carburetor cleaner at each injector where it mounts in the intake manifold. No changes in engine idle detected. I pulled the fuel rail out with the injectors and turned the key to RUN. The pump ran for about 2 seconds and none of the injectors leaked. Pressure still drops but not nearly as rapidly as before. Hmmm. That sounds like the check valve at the regulator in the tank (1996 fuel pump and return-less fuel rail) may be the cause of that but not the high positive fuel trim. Somehow the ECU is being told there's a lean condition and it keeps ramping up the fuel. I do see an increase from 3.9ms to over 5ms in the injector pulse times. So it is reacting to something. Unplugging the O2 did not correct that as it fell back to default fuel tables. It's almost like it is still seeing a lean condition which is why the MAP sensor was swapped out. It does run better without the MAP sensor plugged into the vacuum system. A clue perhaps?
Now all three ECUs (original '93 and two '95s) I own have been swapped into service with exactly the same results so I can rule out the ECU. I even swapped my factory CKP sensor back in from when it was swapped out during the last ignition failure a year ago. Still no improvement. This leaves four things left to check.
1) CSP sensor in the distributor
2) Wiring between MAP, TPS, and ECU
3) Compression test
3a) Visual inspection. Hard internal mechanical issue like broken valve spring, broken rocker arm/pushrod, broken piston rings or pistons. Without a good bore scope I am not able to view the piston tops for any damage.
So tomorrow's lunchtime work session will be to do a compression test. Failing that the valve cover comes off and a visual inspection will be made of the valvetrain. If it passes compression, CSP testing will have to be done. If it pulses properly, then the TPS and its power source will be checked. If that passes it comes down to a wiring fault.
Failing the mechanical test will determine if I have a vehicle to drive or not.
That's it for now.
_____________________
December 3, 2022
On the 1st I put a factory CKP sensor back in after checking that it passed a basic bench test. This was one I had replaced last year when it wouldn't start out of overwhelming input from everyone saying the crank position sensor was bad and had to be replaced. After replacing it, it still wouldn't start and nobody would own up to being wrong. I think "replace the CPS!" is a generic blanket statement for those that got lucky and it fixed their problem. It is repeated sooooo often that it becomes mistaken as absolute fact. So having this as a spare seemed like a good idea at the time. Fast forward to Nov. 20, 2022 and I'm checking the cap and rotor first. There was no CEL or MIL if you prefer, thus there wasn't any diagnosis data. Even the scan tool failed to pickup anything.
After installing it I cranked the engine and it fired right up. I bench checked the one I just pulled out and got a reading I shouldn't have. So in this instance I am confident the CKP was a part of the problem. Just not all of it. She still runs very rich with an AFF of +24. The O2 sensor voltage swings looked fine. The engine is running and it's not clear why it loads up and wants to stall. I unplugged the vacuum line to the MAP sensor and it smoothed out. I capped off the manifold port and she idled really good. The AFF was not coming down after 30 minutes or so of running.
I reconnected my original MAP sensor to find the same results. I was getting good voltage to the MAP, TPS, and the CMP sensors. I even disconnected the 60 way ECU connector and checked for bad wiring. I noted a couple of pinched wires under the plastic header cover but those tested good continuity. So I'm left with a hot compression test and ignition coil check.
After the compression test passed well with cylinders 1-5 @140psi and cylinder 6 @130psi, I happy this part is done. Removing the ignition coil and testing it revealed it was a weak coil. Good ol' Borg Warner parts. They work but not very well. I would up with a Standard Motor Products coil and installed it. After connecting everything up I reset the computer, cleared the AFF, and fired up the engine to let it warm up. The scan tool was showing all good data and the idle ticked over really well. All this with the O2 sensor disconnected so as to force the ECU to default fuel tables.
Off-idle engine acceleration did not hesitate or sputter. Once up to temp it remained so. The AFF was still at 0 and the throttle response was as it should be. Then I reconnected to newly installed O2 sensor.
NTK was the OEM for O2 sensors for Jeep. I had heard about other aftermarket sensors that were said to work but gave the wrong signal values for the Jeeps and other Chrysler products. Bosch being the worst of the bunch. So I special ordered the right one, and NTK 23023 and installed it.
Within a minute the engine idle started getting rough and felt like a misfire. I unplugged it again but it didn't change the engine performance. A quick look at the scan tool showed the AFF was +21. Now I was stumped. The wiring checked out. The AIM was functioning as it should. I had good vacuum, good spark, good timing but a rougher idle than I should have. The ECU was switching between Closed and Open modes almost in sync with the Rich/Lean cycle. So something was still amiss.
I decided to work on the vacuum portion of the situation and the first I did was to remove the CCV from the valve cover grommet. CCV stands for Crank Case Ventilation which differs from PCV or Positive Crankcase Ventilation. A PCV valve has just that, a valve. Usually a ball and spring or pintle and spring set up so the vacuum can overcome the spring tension and allow blow-by gasses and oil vapor to be drawn into the intake manifold and then burned during the combustion cycle.
A CCV, on the other hand, has not valve or moving parts to become gummed up or carbonized and fail to do it's job. Rather, this type of crankcase ventilation is done with a fixed orifice of predetermined size and flow characteristics the ECU expects to have. Well, in removing mine, it snapped off.
I noticed there was a slight hissing sound when I touched it and messing with it revealed it did indeed have a vacuum leak. After replacing it with a new one, I went to remove the old rubber hose to put the system back together only to find this had split. The resulting split exposed the end of the CCV to atmosphere. The vacuum leak in the elbow of the CCV and the hose made no sounds of leaking or hissing until I touched it. It probably was making some noise, but the noise of the engine drowned it out thus making it undetectable by sound.
After repairing that, I again rest the ECU and cleared the drivability data stored and started over. The O2 sensor was still connected and since it had been a few hours since my last engine run, was dead cold. I watched the O2 voltage and the AFF (fuel trim) numbers for anything odd. Yes. It started subtle and became more pronounced. The O2 sensor went into Closed mode within a minute and a half as confirmed by the Rich/Lean switching on the scanner. The idle was doing well for a few minutes and then the miss began again. I revved the engine and it did not stumble like before so I think I got the vacuum leaks taken care of. Driving home I felt her want to miss more and more. I eventually had to hold the idle up as I was afraid it would stall and not restart on the way home. She does drive better and the stumble is gone completely.
So I took my birthday off yesterday and decided I wasn't going to work on it. I watched videos for hours yesterday about O2 sensors, fuel trims, sensor testing and signal scoping. Paul Danner of ScannerDanner is an instructor at Rolesdale Technical College near Pittsburg. His videos are exactly the kind of detailed, logical approach type videos I've been looking for. One of his videos shows how to test the CKP and CMP sensors with his tablet scanner. Granted he's working on all OBD-II stuff but the principle is the same. The commonality is seeing the signals from the sensors. They are all voltage signals over time. I don't have an Autoscope but I do have a pocket DSO, digital storage oscilloscope. I did try to use it earlier in testing and successfully viewed the camshaft position pulses to make sure it was reading 5V on and 0V off. On these Jeeps the CMP is only used to begin the fuel injection timing. It does absolutely nothing for ignition timing or ignition advance. Technically it's NOT a camshaft sync signal. The ECU uses the signal in its rotation relative to the crankshaft for nothing more than an ON-OFF switch for injector timing. Ignition timing is done purely from the CKP signal, throttle position, O2 sensor values, and MAP sensor values.
Today I thought I would get the DSO back out after setting it up for the CKP and try to see the much faster (read that as higher frequency) pulsing of the signal. My hope is to see if there is a hiccup in the signal integrity that might indicate this CKP sensor has issues or not. I do have a spare ordered and should be here next week.
I have good flow through the exhaust system so I'm not so inclined to cutting the catalytic converter out just yet as I no longer suspect a melted core.
Well, that's it for now. Hoping to get some more diagnostics done today.
_____________________
December 28, 2022
Since the last posting I've replaced the fuel pump with the bad pressure regulator on it. 1996 model XJs moved from return line to a return-less fuel supply and was the only year the in-tank pressure regulator was used in the XJ. 1997 models used a combination filter/regulator externally mounted to the top of the fuel pump with a new design poly tank and pump set up. 1995 and older models used a return line system. I decided on the '96 simply because I had already bought a replacement tank but retained the return line system after replacing the fuel pump motor. With a planned upgrade to a stroker engine in a year started, I wanted the higher fuel rail pressure for the 24lb/hr (static) injectors. The stock injector would flow a little more but nothing the '1993 original ECU couldn't handle.
I bought a cheap pump that would work from US Motor Works. It did well until the regulator crapped out. The pump was strong but without a replacement option for the regulator, the whole pump needed to be replaced. I had read a forum post on the Cherokee Forum site that used a standard Jeep regulator with vacuum control. Without vacuum the regulator puts out its highest set pressure. Since I don't have a factory pump I couldn't tell what the regulator looked like or even if the recommended one would fit the housing. So I broke down and bought the Crown pump for $200. Crown has been around for a long time and I trust their parts. These are about as close to factory parts as you can get. I trust them more than Dorman. I also have their Slip Yoke Eliminator kit under their Rough Trail Systems brand. So far, so good.
Now the Crown pump came in and is installed. After an initial issue with the pump O-ring the tank is sealed and I have my first full tank. With the fuel pressure problem taken care of, the engine runs more smoothly at speed. At idle it's better but not smooth. She misfires rich still.
I reinstalled the factory O2 sensor just to see if I get different results. I got an even better idle and off-idle-performance than with the NTK O2 sensor which is the OEM. So either I have a bad "new" O2 sensor or the design was changed and now my old OBD-I computer can't compensate for the way it works. The idle with the factory is more consistent and doesn't surge or sputter evenly as before. Now the misfires seem more random like on any cylinder instead of just two specific ones.
The vacuum readings get better as the engine warms up to operating temperatures which is normal. Today I discovered an exhaust leak after starting up in the morning to head to work. Once at work I got under there and checked the manifold-to-pipe nuts. They were snug but not tight. I tightened them and checked again after work to head back home. The noise of the leak wasn't as prevalent but still there. During the trip home she ran differently. Not better so much as more consistent. Her idle was a tad lower but the O2 sensor wasn't swinging Rich to Lean and back like before. She sat on Rich until I got on the power and up to speed. Once leveled out the sensor was responding in the typical Rich/Lean swing as normally it would. The ECU still jumps back and forth from Open to Closed so I think there's still something going on.
So with this "different" operating characteristic, I think I'm closing in on the main issue. A leak of some kind. If in the exhaust system, a leak upstream from the O2 sensor will throw the sensor off when air gets sucked into the exhaust system. This introduces oxygen into the exhaust stream and the O2 sensor will read a lean condition. A valve that doesn't close completely can do that too but I'm not sure which valve has to stay open. I think an exhaust valve is the one. Anyway, an intake leak tells the ECU there's a part-throttle open condition and will add fuel thus raising the idle speed. This doesn't seem to be the case here. The idle speed is held at 700-750 so I'm leaning towards the exhaust leak. Hoping to get this done soon. 6 MPG isn't cost effective.
This will be my last entry on this post for the year. Look ahead to Trail III after January 1, 2023.
Have a safe and Happy New Year! 🎆🎇✨🎉🎊🍾


No comments:
Post a Comment